

Introduction to Texas Trash Dip
What is Texas Trash Dip?
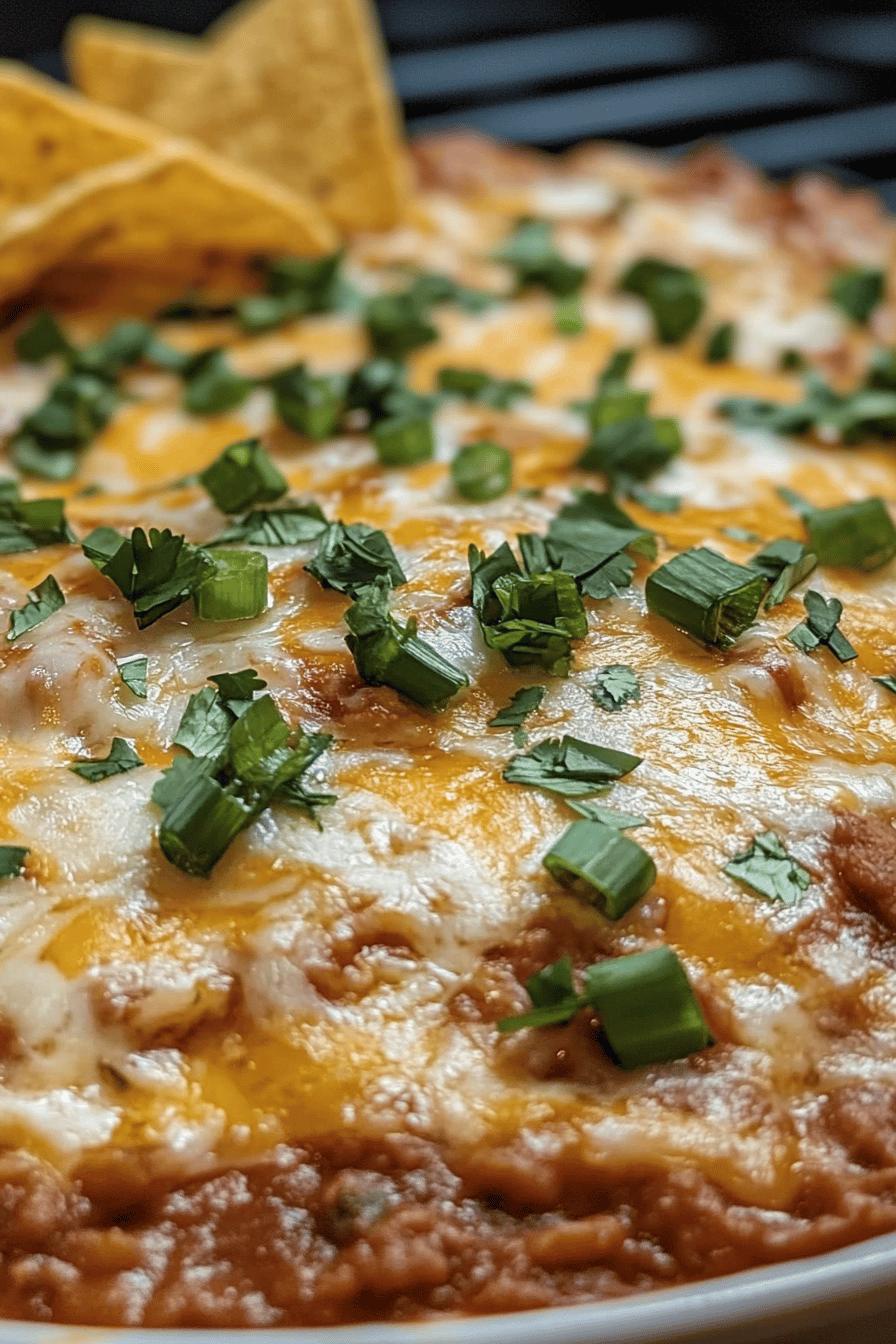
Texas Trash Dip is a delightful and hearty appetizer that brings together a medley of flavors. This dip is a layered masterpiece, featuring refried beans, creamy cheese, and a kick of taco seasoning. Topped with gooey melted cheese, it’s a dish that’s sure to impress your guests. Whether you’re hosting a game day party or a casual get-together, this dip is the perfect addition to your spread. Its Tex-Mex roots make it a favorite among many, and once you try it, you’ll understand why!
Why You’ll Love Texas Trash Dip
There are countless reasons to love Texas Trash Dip! First, it’s incredibly easy to make, which means you can whip it up in no time. The combination of creamy and zesty flavors creates a taste sensation that’s hard to resist. Plus, it’s versatile! You can serve it with tortilla chips, fresh veggies, or even as a topping for tacos. This dip is not just a snack; it’s a crowd-pleaser that brings people together. With its rich flavors and satisfying texture, Texas Trash Dip is sure to become a staple at your gatherings.
Ingredients for Texas Trash Dip
To create the mouthwatering Texas Trash Dip, you’ll need a few simple ingredients. Each component plays a vital role in building the rich and creamy layers that make this dip so irresistible. Here’s what you’ll need:
- 1 can (15 oz) of refried beans
- 1 cup of cream cheese, softened
- 1 cup of sour cream
- 1 packet (1 oz) of taco seasoning
- 1 cup of shredded cheddar cheese
- 1 cup of shredded Monterey Jack cheese
- 1 can (4 oz) of diced green chilies (optional for extra flavor)
- Chopped green onions for garnish (optional)
These ingredients come together to create a dip that’s creamy, cheesy, and packed with flavor. The refried beans provide a hearty base, while the cream cheese and sour cream add a smooth texture. The taco seasoning gives it that signature Tex-Mex kick, and the melted cheese on top is simply the cherry on the cake! Feel free to adjust the ingredients to suit your taste. For instance, you can add more cheese or spice it up with jalapeños. The possibilities are endless!
Preparation of Texas Trash Dip
Step 1: Gather Your Ingredients
Before you start cooking, it’s essential to gather all your ingredients. This makes the process smoother and more enjoyable. Make sure you have everything listed in the ingredients section. Having your refried beans, cream cheese, sour cream, taco seasoning, and cheeses ready will set you up for success. Don’t forget the optional diced green chilies and green onions for garnish!
Step 2: Layer the Refried Beans
Now that you have everything ready, it’s time to start layering! Begin by spreading the refried beans evenly in the bottom of a baking dish. Use a spatula to smooth them out. This layer serves as the hearty base of your dip. Make sure to cover the entire bottom of the dish for a consistent flavor in every bite. The beans add a rich texture that pairs perfectly with the other ingredients.
Step 3: Add the Creamy Cheese
Next, it’s time to add the creamy cheese layer. Take your softened cream cheese and sour cream, and mix them together in a bowl until smooth. This mixture will create a luscious layer on top of the refried beans. Spread it evenly over the beans, ensuring every corner is covered. The creaminess of this layer is what makes Texas Trash Dip so delightful!
Step 4: Sprinkle the Taco Seasoning
Now, sprinkle the taco seasoning over the creamy cheese layer. This step is crucial as it adds that signature Tex-Mex flavor. Use a spoon to distribute the seasoning evenly. You can adjust the amount based on your spice preference. If you love a little heat, feel free to add more! The seasoning will infuse the dip with a zesty kick that everyone will love.
Step 5: Top with Gooey Melted Cheese
It’s time for the best part—cheese! Take your shredded cheddar and Monterey Jack cheese and sprinkle them generously over the taco seasoning layer. The more cheese, the better! This layer will melt beautifully in the oven, creating a gooey, cheesy topping that’s hard to resist. Make sure to cover the entire surface for that perfect cheesy goodness.
Step 6: Bake to Perfection
Finally, preheat your oven to 350°F (175°C). Once it’s ready, place your layered dip in the oven and bake for about 20-25 minutes. You’ll know it’s done when the cheese is bubbly and golden brown. The aroma will fill your kitchen, making it hard to wait! Once baked, let it cool for a few minutes before serving. This will help the layers set a bit, making it easier to scoop. Enjoy your delicious Texas Trash Dip!
Variations of Texas Trash Dip
Vegetarian Texas Trash Dip
If you’re looking for a meat-free option, the Vegetarian Texas Trash Dip is a fantastic choice! Simply skip any meat ingredients and focus on the delicious layers of beans, cheese, and spices. You can add more veggies like diced bell peppers, corn, or black olives for extra flavor and texture. These additions not only enhance the taste but also make the dip colorful and appealing. This version is perfect for vegetarians and anyone who loves a hearty, veggie-packed dip!
Spicy Texas Trash Dip
For those who crave a little heat, the Spicy Texas Trash Dip is the way to go! To spice things up, consider adding diced jalapeños or a splash of hot sauce to the creamy cheese layer. You can also use spicy taco seasoning instead of the regular kind. This variation will give your dip a fiery kick that will delight spice lovers. Just be sure to balance the heat with the creamy layers to keep it enjoyable for everyone!
Tex-Mex Twist on Texas Trash Dip
Want to give your Texas Trash Dip a unique twist? Try the Tex-Mex version! Incorporate ingredients like guacamole or salsa into the layers. You can spread a layer of guacamole right on top of the refried beans before adding the creamy cheese. Alternatively, mix some salsa into the sour cream for a zesty flavor boost. This variation adds a fresh and vibrant taste, making it a fun and exciting option for your gatherings!
Cooking Note for Texas Trash Dip
When preparing Texas Trash Dip, there are a few cooking notes to keep in mind to ensure your dip turns out perfectly every time. First, make sure to preheat your oven before placing the dip inside. This step is crucial for even cooking and helps the cheese melt beautifully. If you’re using a glass baking dish, reduce the oven temperature slightly to prevent it from cracking.
Additionally, if you prefer a crispier top, consider broiling the dip for the last few minutes of baking. Just keep a close eye on it to avoid burning. Another tip is to let the dip sit for a few minutes after baking. This allows the layers to set, making it easier to scoop and serve. Lastly, feel free to experiment with the baking time. If you like your cheese extra bubbly, you can bake it a little longer, but be cautious not to overcook it.
By following these cooking notes, you’ll create a Texas Trash Dip that’s not only delicious but also visually appealing. Your guests will be impressed by the gooey, cheesy goodness, and you’ll be the star of the gathering!
Serving Suggestions for Texas Trash Dip
Best Dippers for Texas Trash Dip
When it comes to enjoying Texas Trash Dip, the right dippers can elevate your experience. Here are some fantastic options to consider:
- Tortilla Chips: The classic choice! Crispy tortilla chips are perfect for scooping up the creamy dip. Their crunch complements the smooth texture of the dip beautifully.
- Fresh Veggies: For a healthier option, serve the dip with fresh veggies like carrot sticks, celery, or bell pepper strips. They add a nice crunch and a refreshing taste.
- Pita Chips: These are another great alternative. Their sturdy texture holds up well against the dip, making them a favorite among many.
- Crackers: Choose your favorite crackers for a delightful pairing. Their variety of flavors can add an interesting twist to each bite.
- Mini Tacos: For a fun twist, use mini taco shells as dippers. Fill them with the dip for a bite-sized treat that’s bursting with flavor!
Feel free to mix and match these dippers to create a colorful and inviting platter. Your guests will love the variety, and it will make your Texas Trash Dip even more enjoyable!
Pairing Drinks with Texas Trash Dip
To complement the rich flavors of Texas Trash Dip, consider serving it with refreshing drinks. Here are some great pairing ideas:
- Beer: A cold beer, especially a light lager or a pale ale, pairs wonderfully with the dip. The crispness of the beer balances the creaminess of the dip.
- Margaritas: For a true Tex-Mex experience, serve margaritas! Their tangy flavor and refreshing nature make them a perfect match.
- Soda: If you prefer non-alcoholic options, soda works well. Choose a citrus-flavored soda for a zesty kick that complements the dip.
- Iced Tea: A glass of sweet iced tea can also be a delightful pairing. Its sweetness balances the savory flavors of the dip.
- Water Infused with Lime: For a refreshing and light option, serve water infused with lime or lemon. It cleanses the palate and keeps everyone hydrated!
By offering a variety of dippers and drinks, you’ll create a fun and festive atmosphere for your gathering. Your Texas Trash Dip will be the star of the show, and your guests will leave with full bellies and happy hearts!
Tips for Making the Perfect Texas Trash Dip
Creating the perfect Texas Trash Dip is all about attention to detail and a few handy tips. With these suggestions, you’ll ensure your dip is a hit at any gathering!
- Use Room Temperature Ingredients: Before you start, let your cream cheese and sour cream sit out for about 30 minutes. This makes them easier to mix and spread, resulting in a smoother texture.
- Layering is Key: Take your time when layering the ingredients. Each layer should be spread evenly to ensure every bite is packed with flavor. This also helps the dip cook evenly.
- Experiment with Cheese: While cheddar and Monterey Jack are classic choices, feel free to mix in other cheeses like pepper jack for a spicy kick or gouda for a smoky flavor. The cheese is what makes this dip so delicious!
- Don’t Skip the Garnish: Adding chopped green onions or fresh cilantro on top not only enhances the flavor but also adds a pop of color. A little garnish goes a long way in making your dip look appealing.
- Adjust the Spice Level: If you’re serving a crowd, consider the spice tolerance of your guests. You can always serve hot sauce on the side for those who want to add extra heat!
- Let it Rest: After baking, let the dip sit for about 5-10 minutes before serving. This helps the layers set and makes it easier to scoop without falling apart.
- Make it Ahead: If you’re short on time, prepare the dip a day in advance. Just cover it and store it in the fridge. When you’re ready, pop it in the oven to bake. This can save you time on the day of your gathering!
By following these tips, you’ll create a Texas Trash Dip that’s not only delicious but also visually stunning. Your guests will be raving about it long after the last bite!
Breakdown of Time for Texas Trash Dip
Prep Time
Preparing Texas Trash Dip is quick and easy! You’ll need about 15-20 minutes to gather your ingredients and layer them in the baking dish. This includes mixing the cream cheese and sour cream, spreading the refried beans, and adding the cheese and taco seasoning. With everything ready, you’ll be on your way to a delicious dip in no time!
Cooking Time
Once your dip is layered, it’s time to bake! Preheat your oven to 350°F (175°C) and bake the dip for about 20-25 minutes. You’ll know it’s done when the cheese is bubbly and golden brown. If you prefer a crispier top, you can broil it for an additional 2-3 minutes, but keep a close eye on it to prevent burning.
Total Time
In total, you’re looking at about 35-45 minutes from start to finish. This includes both prep and cooking time. With such a quick turnaround, Texas Trash Dip is perfect for last-minute gatherings or game day snacks. Your friends and family will love it, and you’ll enjoy the ease of making it!
Nutritional Information for Texas Trash Dip
Calories in Texas Trash Dip
When indulging in Texas Trash Dip, it’s good to know what you’re consuming. A typical serving of this delicious dip, which is about 1/4 cup, contains approximately 250-300 calories. This can vary based on the specific ingredients you use, especially the types and amounts of cheese and sour cream. While it’s a rich and creamy treat, enjoying it in moderation will allow you to savor its flavors without overdoing it!
Protein Content in Texas Trash Dip
Texas Trash Dip is not only tasty but also provides a decent amount of protein. Each serving contains around 10-12 grams of protein, thanks to the refried beans, cream cheese, and shredded cheeses. This makes it a satisfying snack that can help keep you full. If you want to boost the protein content even more, consider adding some cooked ground turkey or chicken to the layers!
Sodium Levels in Texas Trash Dip
One thing to keep in mind is the sodium content in Texas Trash Dip. A serving typically contains about 600-800 mg of sodium. This is primarily due to the taco seasoning and the cheeses used. If you’re watching your sodium intake, you can opt for low-sodium versions of the ingredients. Additionally, making your own taco seasoning can help control the salt levels while still delivering that delicious flavor!
FAQs about Texas Trash Dip
Can I make Texas Trash Dip ahead of time?
Absolutely! Making Texas Trash Dip ahead of time is a great idea. You can prepare the dip a day in advance and store it in the refrigerator. Just layer all the ingredients in your baking dish, cover it tightly with plastic wrap, and pop it in the fridge. When you’re ready to serve, simply bake it as directed. This not only saves you time but also allows the flavors to meld together, making it even tastier!
What can I substitute for refried beans in Texas Trash Dip?
If you’re looking for a substitute for refried beans, there are several options! You can use black beans or pinto beans instead. Just mash them up a bit to create a similar texture. Another option is to use hummus for a unique twist. It adds a different flavor profile while still providing that creamy base. Feel free to get creative and choose what suits your taste best!
How long can Texas Trash Dip be stored in the fridge?
Texas Trash Dip can be stored in the fridge for about 3-4 days. Make sure to keep it in an airtight container to maintain its freshness. When you’re ready to enjoy it again, you can reheat it in the oven or microwave. Just be sure to heat it until it’s warmed through and the cheese is melty again. This way, you can savor the deliciousness even after the initial serving!
Can I freeze Texas Trash Dip?
Yes, you can freeze Texas Trash Dip! To do this, prepare the dip as usual, but do not bake it. Instead, cover it tightly with plastic wrap and then aluminum foil to prevent freezer burn. It can be stored in the freezer for up to 2-3 months. When you’re ready to enjoy it, thaw it in the fridge overnight and then bake it as directed. This makes it a convenient option for future gatherings!
Conclusion on Texas Trash Dip
Final Thoughts on Enjoying Texas Trash Dip
In conclusion, Texas Trash Dip is more than just a delicious appetizer; it’s a celebration of flavors that brings people together. Whether you’re hosting a game day party, a family gathering, or simply enjoying a cozy night in, this dip is sure to impress. Its creamy layers, zesty taco seasoning, and gooey cheese create a delightful experience for your taste buds.
Moreover, the versatility of Texas Trash Dip allows you to customize it to your liking. From vegetarian options to spicy variations, there’s a version for everyone. Plus, with easy preparation and quick baking time, you can whip it up in no time, making it a go-to recipe for any occasion.
So, gather your friends and family, and serve up this crowd-pleaser at your next gathering. Don’t forget to pair it with your favorite dippers and drinks for a complete experience. With Texas Trash Dip on the table, you’re guaranteed to create lasting memories filled with laughter and joy. Enjoy every cheesy, flavorful bite!
Relevant Recipes Link:
Looking to expand your seafood soup repertoire? Try these delectable recipes:
For more fantastic recipes and food inspiration, follow us on Pinterest!