

Introduction to Reese’s Peanut Butter Bars Recipe
The Allure of Peanut Butter and Chocolate
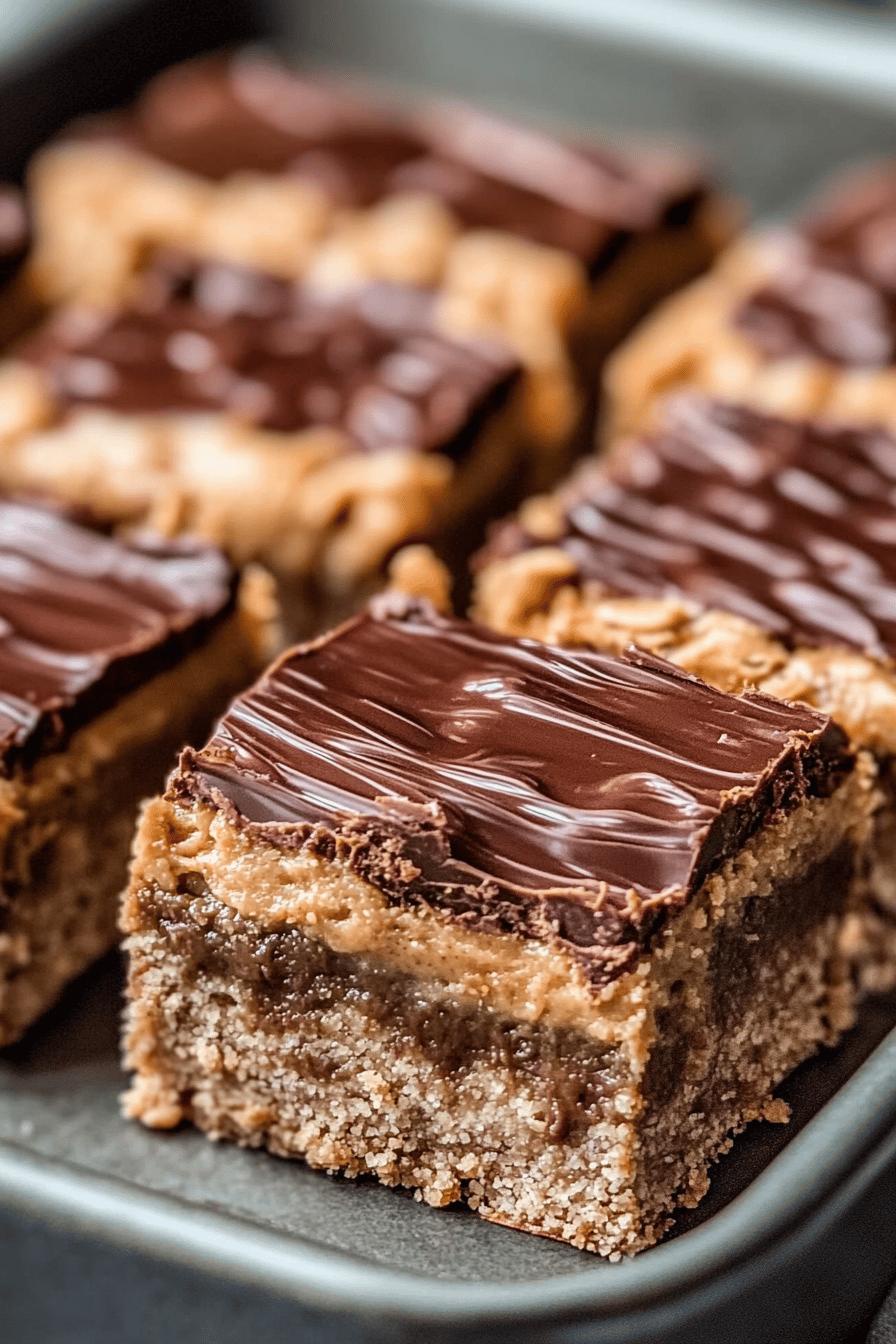
Peanut butter and chocolate are a match made in heaven. The creamy, nutty flavor of peanut butter pairs perfectly with the rich, sweet taste of chocolate. This combination has captured the hearts of many dessert lovers. Whether you enjoy it in a classic sandwich or as a decadent dessert, the allure of peanut butter and chocolate is undeniable. In this recipe, we bring you a delightful twist on the traditional Reese’s treat. With just a few simple ingredients, you can create a bar that satisfies your sweet tooth while keeping your health in mind.
Why Choose a Healthier Version?
Choosing a healthier version of your favorite treats doesn’t mean sacrificing flavor. In fact, this Reese’s Peanut Butter Bars recipe uses wholesome ingredients that provide a guilt-free indulgence. By swapping out refined sugars and unhealthy fats, you can enjoy a delicious dessert that aligns with your dietary goals. This recipe is low in sugar, gluten-free, and vegetarian, making it suitable for various lifestyles. Plus, it’s easy to make, so you can whip up a batch whenever a craving strikes. Embrace the joy of treating yourself without the guilt!
Ingredients for Reese’s Peanut Butter Bars Recipe
To create your own batch of Reese’s Peanut Butter Bars, you’ll need a few simple ingredients. Each one plays a vital role in achieving that delicious blend of flavors. Here’s what you’ll need:
- 1 cup creamy peanut butter: This is the star of the show! Choose natural peanut butter for a healthier option.
- 1 cup almond flour: This gluten-free flour adds texture and helps bind the bars together.
- 1/4 cup sweetener: You can use a low-calorie sweetener like stevia or monk fruit to keep it low-sugar.
- 1 teaspoon vanilla extract: This adds a lovely depth of flavor to the bars.
- 1/4 teaspoon salt: A pinch of salt enhances the sweetness and balances the flavors.
- 1 cup dark chocolate chips: Opt for sugar-free or low-sugar chocolate chips for a healthier choice.
- 2 tablespoons coconut oil: This helps to melt the chocolate smoothly and adds a hint of tropical flavor.
With these ingredients, you’re well on your way to making a delightful treat that’s both satisfying and nutritious. Gather them up, and let’s move on to the next step in creating your Reese’s Peanut Butter Bars!
Step-by-Step Preparation of Reese’s Peanut Butter Bars Recipe
Step 1: Mixing the Base Ingredients
To start, grab a large mixing bowl. Add the creamy peanut butter, almond flour, sweetener, vanilla extract, and salt. Use a spatula or a wooden spoon to mix everything together. You want to achieve a smooth and well-combined mixture. It should be thick but manageable. If you find it too dry, a splash of water can help. This base is where the magic begins, so make sure it’s mixed well!
Step 2: Pressing the Mixture into the Dish
Next, take a lined dish, preferably an 8×8 inch square pan, and transfer your peanut butter mixture into it. Using your hands or the back of a spoon, press the mixture firmly into the bottom of the dish. Make sure it’s even and compact. This step is crucial as it forms the base of your bars. A well-pressed base will hold together nicely once set. Don’t rush this part; take your time to get it just right!
Step 3: Melting Chocolate and Coconut Oil
Now, it’s time to melt the chocolate! In a microwave-safe bowl, combine the dark chocolate chips and coconut oil. Heat them in the microwave in 30-second intervals, stirring in between. This method prevents burning. Once melted, the mixture should be smooth and glossy. If you prefer, you can also melt the chocolate using a double boiler on the stove. Either way, be careful not to overheat it!
Step 4: Pouring the Chocolate Layer
With your chocolate mixture ready, pour it over the pressed peanut butter base. Use a spatula to spread it evenly across the top. This chocolate layer adds a rich, decadent finish to your bars. If you like, sprinkle some crushed nuts or a pinch of sea salt on top for added texture and flavor. It’s a simple way to elevate your bars and make them even more delicious!
Step 5: Chilling and Slicing the Bars
Finally, place the dish in the refrigerator. Let it chill for at least 2 hours, or until the chocolate is set. Once firm, remove the dish from the fridge. Use a sharp knife to slice the bars into squares or rectangles, depending on your preference. Serve them cold for a refreshing treat. These bars are perfect for satisfying your sweet cravings without the guilt!
Variations of Reese’s Peanut Butter Bars Recipe
Adding Crunch with Nuts
If you love a bit of crunch in your treats, consider adding nuts to your Reese’s Peanut Butter Bars. Chopped peanuts, almonds, or even walnuts can enhance the texture and flavor. Simply mix in about 1/2 cup of your favorite nuts into the peanut butter base before pressing it into the dish. This addition not only provides a delightful crunch but also boosts the nutritional value of your bars. Nuts are packed with healthy fats and protein, making your dessert even more satisfying. Plus, they complement the creamy peanut butter beautifully!
Flavor Twists with Sea Salt
For those who enjoy a sweet and salty combination, adding sea salt can elevate your Reese’s Peanut Butter Bars to a whole new level. After pouring the melted chocolate over the base, sprinkle a pinch of flaky sea salt on top. This simple step enhances the chocolate’s richness and balances the sweetness of the peanut butter. The contrast of flavors creates a delightful experience for your taste buds. You can also experiment with flavored salts, like smoked sea salt, for a unique twist. It’s a small change that makes a big impact!
Cooking Note for Reese’s Peanut Butter Bars Recipe
When preparing your Reese’s Peanut Butter Bars, there are a few important cooking notes to keep in mind. These tips will help ensure that your bars turn out perfectly every time. First, always use high-quality ingredients. The flavor of your bars depends on the quality of the peanut butter and chocolate you choose. Opt for natural peanut butter without added sugars or oils for the best results.
Next, be mindful of the temperature when melting chocolate. If you overheat it, the chocolate can seize up, making it difficult to work with. Stirring frequently while melting helps maintain a smooth consistency. If you find your chocolate is too thick, adding a little more coconut oil can help thin it out.
Additionally, patience is key when chilling your bars. Allowing them to set in the refrigerator for the full recommended time ensures that they firm up properly. If you try to slice them too soon, they may crumble or fall apart. Once chilled, use a sharp knife to cut through the bars cleanly. Wiping the knife with a damp cloth between cuts can help achieve neat edges.
Lastly, feel free to get creative! This recipe is versatile, so don’t hesitate to experiment with different flavors or toppings. Whether you add a swirl of caramel, a layer of coconut, or even a sprinkle of cinnamon, the possibilities are endless. Enjoy the process and have fun making these delicious bars!
Serving Suggestions for Reese’s Peanut Butter Bars Recipe
Pairing with Beverages
When it comes to enjoying your Reese’s Peanut Butter Bars, the right beverage can enhance the experience. A warm cup of coffee or tea pairs beautifully with these bars. The rich flavors of the chocolate and peanut butter complement the warmth of your drink. If you prefer something colder, a glass of almond milk or a smoothie can be refreshing. For a special treat, try a chocolate milkshake! The creamy texture and sweet flavor will make your dessert time even more delightful. No matter what you choose, these bars are sure to shine alongside your favorite beverages!
Presentation Ideas for Serving
Presentation is key when serving your Reese’s Peanut Butter Bars. A beautiful display can make your dessert feel even more special. Start by arranging the sliced bars on a decorative plate or a wooden board. You can add a sprinkle of crushed nuts or a drizzle of melted chocolate on top for an eye-catching touch. For an elegant look, consider using parchment paper to line the plate. This adds a rustic charm and makes for easy cleanup.
Additionally, you can serve the bars with fresh fruit, like strawberries or banana slices, for a pop of color. This not only enhances the visual appeal but also adds a refreshing contrast to the rich flavors of the bars. If you’re hosting a gathering, consider creating a dessert platter with a variety of treats, including your Reese’s Peanut Butter Bars. This way, guests can enjoy a selection of flavors while indulging in your delicious creation!
Tips for Perfecting Your Reese’s Peanut Butter Bars Recipe
Creating the perfect Reese’s Peanut Butter Bars is all about attention to detail. Here are some handy tips to ensure your bars turn out delicious every time:
- Use Room Temperature Ingredients: For the best mixing results, make sure your peanut butter is at room temperature. This makes it easier to blend with the other ingredients, resulting in a smoother base.
- Choose Quality Chocolate: The chocolate layer is crucial for flavor. Opt for high-quality dark chocolate chips. They not only taste better but also melt more smoothly.
- Don’t Skip the Salt: A pinch of salt in the peanut butter mixture enhances the overall flavor. It balances the sweetness and brings out the nutty taste of the peanut butter.
- Chill Thoroughly: Allow your bars to chill for at least two hours. This ensures they set properly and makes slicing easier. If you’re in a hurry, you can place them in the freezer for about 30 minutes.
- Experiment with Sweeteners: If you’re not a fan of the sweetener suggested, feel free to try alternatives like honey or maple syrup. Just remember that this may alter the texture slightly.
- Store Properly: Keep your bars in an airtight container in the fridge. This helps maintain their freshness and prevents them from becoming too soft.
- Customize Your Toppings: Get creative with toppings! Consider adding shredded coconut, mini chocolate chips, or even a drizzle of caramel for a unique twist.
By following these tips, you’ll be well on your way to mastering the art of making Reese’s Peanut Butter Bars. Enjoy the process and savor every bite of your delicious creation!
Breakdown of Time for Reese’s Peanut Butter Bars Recipe
Prep Time
The prep time for your Reese’s Peanut Butter Bars is quite short! You’ll need about 15 minutes to gather your ingredients and mix them together. This includes measuring out the peanut butter, almond flour, sweetener, and other components. It’s a quick and easy process that allows you to get started on your delicious treat without much fuss.
Cooking Time
When it comes to cooking time, the only real cooking involved is melting the chocolate and coconut oil. This should take around 5 minutes, depending on your method. If you’re using a microwave, remember to do it in 30-second intervals to avoid burning. If you opt for a double boiler, keep an eye on it to ensure a smooth melt. The rest of the time is spent chilling the bars, which is essential for setting them properly.
Total Time
In total, you’re looking at about 2 hours and 20 minutes from start to finish. This includes the 15 minutes of prep time and the 2 hours of chilling time. While it may seem like a long wait, the end result is well worth it! You’ll have a batch of delicious, homemade Reese’s Peanut Butter Bars ready to enjoy. Plus, the waiting time gives you a chance to plan how you’ll serve them or what beverages to pair them with!
Nutritional Information for Reese’s Peanut Butter Bars Recipe
Calories
When indulging in your homemade Reese’s Peanut Butter Bars, it’s good to know the calorie content. Each bar contains approximately 150 calories. This makes them a satisfying treat without going overboard on calories. Enjoying one or two bars can fit nicely into a balanced diet, especially when you’re looking for a sweet snack that won’t derail your health goals.
Protein Content
These bars are not just delicious; they’re also a good source of protein! Each bar provides about 5 grams of protein. The peanut butter and almond flour contribute to this protein content, making these bars a great option for a post-workout snack or a mid-afternoon pick-me-up. The protein helps keep you feeling full and satisfied, which is perfect for curbing those sweet cravings.
Sodium Levels
In terms of sodium, each bar contains around 80 milligrams. This is relatively low, especially compared to many store-bought snacks. Keeping sodium levels in check is important for overall health, and these bars fit the bill. The pinch of salt used in the recipe enhances flavor without adding excessive sodium, making them a smart choice for those watching their salt intake.
FAQs about Reese’s Peanut Butter Bars Recipe
Can I use regular flour instead of almond flour?
While you can use regular flour, it’s important to note that this recipe is designed to be gluten-free. Almond flour not only adds a nutty flavor but also helps keep the bars moist. If you choose to use regular flour, the texture may change, and you might need to adjust the amount slightly. Start with less and add more as needed to achieve the right consistency.
How long do these bars last in the fridge?
Your Reese’s Peanut Butter Bars can last up to one week in the fridge when stored in an airtight container. This makes them a great make-ahead treat! Just be sure to keep them chilled to maintain their firmness. If you want to enjoy them longer, consider freezing them. They can last for up to three months in the freezer. Just thaw them in the fridge before serving!
Can I make these bars vegan?
Absolutely! To make your Reese’s Peanut Butter Bars vegan, simply choose a plant-based sweetener and ensure that the chocolate chips you use are dairy-free. Many brands offer vegan chocolate options that taste just as delicious. With these simple swaps, you can enjoy a vegan version of this delightful treat without compromising on flavor!
What can I substitute for sweetener?
If you’re looking for alternatives to the sweetener in this recipe, there are several options. You can use honey or maple syrup for a natural sweetener, but keep in mind that this may alter the texture slightly. Another option is agave syrup, which is also a great low-glycemic choice. Just remember to adjust the amount based on your taste preference, as some sweeteners are sweeter than others!
Conclusion on Reese’s Peanut Butter Bars Recipe
In conclusion, the Reese’s Peanut Butter Bars recipe is a delightful way to enjoy the classic flavors of peanut butter and chocolate in a healthier format. With simple ingredients and easy steps, you can create a treat that satisfies your sweet cravings without the guilt. These bars are not only delicious but also versatile, allowing you to customize them with nuts, sea salt, or other toppings to suit your taste.
Whether you’re looking for a quick snack, a post-workout boost, or a sweet addition to your dessert table, these bars fit the bill perfectly. Plus, with their low-sugar and gluten-free attributes, they cater to various dietary needs. So, gather your ingredients, follow the steps, and indulge in a homemade treat that brings joy to your taste buds.
Remember, the best part about making these bars is sharing them with friends and family. They’re sure to impress anyone who tries them! So, don’t hesitate to whip up a batch and enjoy the smiles they bring. Happy baking!
Relevant Recipes Link:
Looking to expand your culinary repertoire with more delightful recipes? Indulge in these mouth-watering options:
- Giant Reese’s Peanut Butter Pie: A Decadent Dessert Delight
- French Onion Butter Rice: A Must-Try Savory Side Dish
For more culinary inspiration and amazing recipes, follow us on Pinterest!