

Introduction to Red Velvet Oreo Cake Roll Explosion
Welcome to the world of delightful desserts! Today, we’re diving into a treat that’s sure to impress: the Red Velvet Oreo Cake Roll Explosion. This dessert combines the rich, velvety texture of red velvet cake with the beloved taste of Oreos. It’s a match made in dessert heaven! Whether you’re celebrating a birthday, hosting a gathering, or simply treating yourself, this cake roll is a fantastic choice.
What Makes the Red Velvet Oreo Cake Roll Explosion Special?
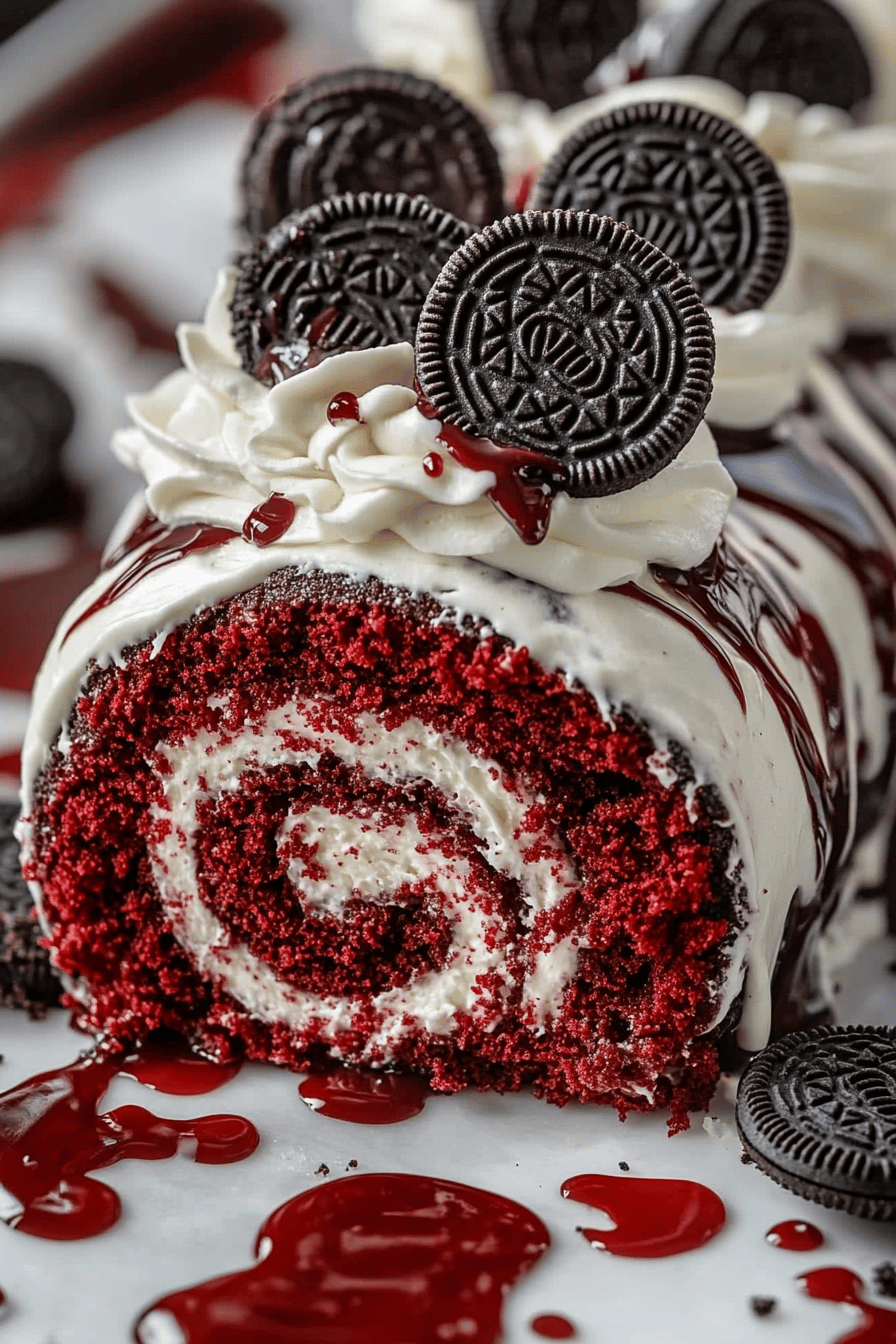
What sets the Red Velvet Oreo Cake Roll Explosion apart? First, it’s the vibrant red color that catches the eye. This cake isn’t just pretty; it’s packed with flavor! The combination of cocoa powder and buttermilk gives the cake its unique taste and moist texture. Then, there’s the creamy Oreo frosting that adds a delightful crunch and sweetness. Finally, the toppings of whipped cream, crushed Oreos, and chocolate syrup create a visual feast that’s hard to resist. Each bite is a delightful explosion of flavors and textures!
The Perfect Dessert for Any Occasion
This cake roll is perfect for any occasion. Planning a birthday party? It’s a showstopper! Hosting a holiday gathering? It will be the highlight of your dessert table. Or maybe you just want to enjoy a sweet treat after dinner? This cake roll fits the bill perfectly. Its versatility makes it a go-to dessert for any celebration. Plus, it’s easy to slice and serve, making it a convenient choice for gatherings. So, get ready to impress your friends and family with this stunning dessert!
Ingredients for Red Velvet Oreo Cake Roll Explosion
To create the mouthwatering Red Velvet Oreo Cake Roll Explosion, you’ll need a selection of simple yet delicious ingredients. Each component plays a vital role in achieving that perfect blend of flavors and textures. Here’s what you’ll need:
For the Red Velvet Cake:
- 1 ½ cups all-purpose flour
- 1 cup granulated sugar
- 1 teaspoon baking powder
- 1 teaspoon baking soda
- ½ teaspoon salt
- 1 teaspoon cocoa powder
- 1 cup vegetable oil
- 1 cup buttermilk, at room temperature
- 2 large eggs
- 2 tablespoons red food coloring
- 1 teaspoon vanilla extract
- 1 teaspoon white vinegar
For the Oreo Frosting:
- 1 cup unsalted butter, softened
- 4 cups powdered sugar
- ½ cup heavy cream
- 1 teaspoon vanilla extract
- 1 cup crushed Oreos (about 10-12 cookies)
For the Toppings:
- 1 cup whipped cream (store-bought or homemade)
- ½ cup crushed Oreos for garnish
- Chocolate syrup for drizzling
With these ingredients, you’re all set to create a stunning dessert that will wow your guests. The combination of red velvet and Oreo flavors is simply irresistible. So, gather your ingredients and get ready to bake!
Step-by-Step Preparation of Red Velvet Oreo Cake Roll Explosion
Now that you have all your ingredients ready, it’s time to dive into the fun part: preparing your Red Velvet Oreo Cake Roll Explosion! Follow these simple steps to create a dessert that will leave everyone wanting more.
Step 1: Preparing the Red Velvet Cake Batter
First, let’s make the cake batter. Start by preheating your oven to 350°F (175°C). In a large mixing bowl, combine the all-purpose flour, sugar, baking powder, baking soda, salt, and cocoa powder. Whisk these dry ingredients together until they are well mixed.
Next, in another bowl, mix the vegetable oil, buttermilk, eggs, red food coloring, vanilla extract, and white vinegar. Whisk these wet ingredients until they are smooth. Now, slowly pour the wet mixture into the dry ingredients. Stir gently until just combined. Be careful not to overmix; a few lumps are okay!
Step 2: Baking the Cake
Once your batter is ready, it’s time to bake! Line a 15×10-inch jelly roll pan with parchment paper. Pour the batter into the pan, spreading it evenly. Bake in the preheated oven for about 15-20 minutes, or until a toothpick inserted in the center comes out clean.
When the cake is done, remove it from the oven and let it cool in the pan for about 5 minutes. Then, carefully flip the cake onto a clean kitchen towel that has been dusted with powdered sugar. Peel off the parchment paper and roll the cake up in the towel, starting from one short end. This helps the cake maintain its shape. Let it cool completely while rolled up.
Step 3: Making the Oreo Frosting
While the cake cools, let’s whip up the delicious Oreo frosting! In a large mixing bowl, beat the softened butter until it’s creamy. Gradually add the powdered sugar, mixing on low speed until combined. Then, add the heavy cream and vanilla extract. Beat on high speed until the frosting is light and fluffy.
Finally, fold in the crushed Oreos. This will give your frosting that delightful cookie crunch. Set the frosting aside until the cake is completely cool.
Step 4: Assembling the Cake Roll
Once the cake has cooled, carefully unroll it from the towel. Spread a generous layer of Oreo frosting over the entire surface of the cake, leaving a small border around the edges. Now, roll the cake back up tightly, starting from the short end. Use the towel to help guide the roll. Place the seam side down on a serving platter.
Step 5: Decorating the Red Velvet Oreo Cake Roll Explosion
Now comes the fun part—decorating! Spread a layer of whipped cream over the top of the cake roll. Then, sprinkle crushed Oreos generously on top. For an extra touch, drizzle chocolate syrup over the cake. This will not only add flavor but also make it look stunning!
Your Red Velvet Oreo Cake Roll Explosion is now ready to be served. Slice it into pieces and watch as everyone enjoys this delightful dessert!
Variations of Red Velvet Oreo Cake Roll Explosion
If you’re looking to mix things up or cater to specific dietary needs, there are plenty of variations you can try with the Red Velvet Oreo Cake Roll Explosion. Let’s explore some gluten-free options and alternative fillings and toppings that will keep this dessert exciting and delicious!
Gluten-Free Options
For those who need a gluten-free treat, you can easily adapt the Red Velvet Oreo Cake Roll. Start by substituting the all-purpose flour with a gluten-free flour blend. Make sure to choose a blend that includes xanthan gum, as this will help mimic the texture of traditional flour. Additionally, check that your baking powder and baking soda are gluten-free. With these simple swaps, you can enjoy the same rich flavors without the gluten!
Alternative Fillings and Toppings
While the Oreo frosting is a star in this recipe, you can get creative with different fillings and toppings. Here are a few ideas:
- Chocolate Ganache: For a rich twist, use chocolate ganache as the filling. Simply melt chocolate with heavy cream and let it cool before spreading it on the cake.
- Peanut Butter Frosting: If you love peanut butter, try a creamy peanut butter frosting instead of the Oreo frosting. It pairs wonderfully with red velvet!
- Fruit Fillings: Consider adding a layer of fresh strawberries or raspberries for a fruity burst. This adds a refreshing contrast to the rich cake.
- Different Toppings: Instead of crushed Oreos, try using crushed nuts, sprinkles, or even coconut flakes for a unique texture and flavor.
These variations allow you to customize your Red Velvet Oreo Cake Roll Explosion to suit your taste and dietary preferences. So, don’t hesitate to experiment and make this dessert your own!
Cooking Note for Red Velvet Oreo Cake Roll Explosion
When preparing the Red Velvet Oreo Cake Roll Explosion, a few cooking notes can help ensure your dessert turns out perfectly. First, always measure your ingredients accurately. Baking is a science, and even a small change can affect the final product. Use measuring cups and spoons for precision.
Next, make sure your oven is preheated before you start baking. This helps the cake rise properly and achieve that fluffy texture we all love. An oven thermometer can be handy to check if your oven is at the right temperature.
While rolling the cake, be gentle. If you roll too tightly, the cake may crack. Conversely, if you roll too loosely, it may not hold its shape. Practice makes perfect, so don’t worry if it takes a couple of tries to get it just right!
Also, allow the cake to cool completely before adding the frosting. If the cake is warm, the frosting may melt, making it difficult to spread. Patience is key here!
Lastly, feel free to get creative with your decorations. The toppings are not just for looks; they add flavor and texture. So, have fun with it! Whether you choose to stick with the classic whipped cream and crushed Oreos or try something new, your cake roll will surely impress.
By keeping these cooking notes in mind, you’ll be well on your way to creating a stunning and delicious Red Velvet Oreo Cake Roll Explosion that everyone will love!
Serving Suggestions for Red Velvet Oreo Cake Roll Explosion
Now that your Red Velvet Oreo Cake Roll Explosion is beautifully decorated and ready to go, it’s time to think about how to serve it! Presentation can elevate your dessert experience, making it even more enjoyable for you and your guests. Here are some delightful serving suggestions to consider:
Slice and Serve
Start by slicing the cake roll into even pieces. Aim for about 1-inch thick slices to ensure everyone gets a generous portion. Arrange the slices on a decorative platter for a beautiful display. You can even place a few whole Oreos or fresh berries around the slices for added color and flair.
Pair with Ice Cream
For an extra indulgent treat, serve each slice with a scoop of vanilla or chocolate ice cream. The creamy texture of the ice cream complements the rich flavors of the cake roll perfectly. You can also drizzle some chocolate syrup over the ice cream for an added touch of sweetness!
Garnish with Fresh Fruits
Fresh fruits can add a refreshing contrast to the rich cake. Consider serving your Red Velvet Oreo Cake Roll with a side of strawberries, raspberries, or even a fruit salad. The tartness of the berries balances the sweetness of the cake, creating a delightful flavor combination.
Drizzle with Extra Chocolate Syrup
If you love chocolate, don’t hold back! Drizzle some extra chocolate syrup over the top of each slice just before serving. This not only enhances the visual appeal but also adds an extra layer of chocolatey goodness that chocolate lovers will adore.
Serve with Whipped Cream
For those who can’t get enough of whipped cream, consider adding a dollop on top of each slice. This adds a light and airy texture that pairs beautifully with the dense cake. You can even sprinkle some crushed Oreos on top of the whipped cream for a fun finishing touch!
With these serving suggestions, your Red Velvet Oreo Cake Roll Explosion will not only taste amazing but also look stunning on the dessert table. Whether it’s a special occasion or a casual gathering, these ideas will help you create a memorable dessert experience for everyone!
Tips for Perfecting Your Red Velvet Oreo Cake Roll Explosion
Creating the perfect Red Velvet Oreo Cake Roll Explosion is all about attention to detail. With a few helpful tips, you can ensure that your dessert turns out beautifully every time. Here are some essential tips to keep in mind:
Use Room Temperature Ingredients
For the best results, make sure your ingredients are at room temperature. This includes eggs, buttermilk, and butter. Room temperature ingredients mix more easily, resulting in a smoother batter and a fluffier cake. Take them out of the fridge about 30 minutes before you start baking.
Don’t Overmix the Batter
When combining your wet and dry ingredients, mix just until everything is combined. Overmixing can lead to a dense cake. A few lumps are perfectly fine! Gently folding the batter will help maintain that light and airy texture.
Check Your Oven Temperature
Oven temperatures can vary, so it’s a good idea to use an oven thermometer. This ensures that your cake bakes evenly. If your oven runs hot, your cake may bake too quickly, leading to dryness. Conversely, if it’s too cool, the cake may not rise properly.
Cool the Cake Completely
After baking, allow the cake to cool completely before adding the frosting. If the cake is warm, the frosting may melt and slide off. Patience is key here! Letting it cool on a wire rack can help speed up the process.
Practice Rolling Technique
Rolling the cake can be tricky, but practice makes perfect! Use a clean kitchen towel dusted with powdered sugar to help prevent sticking. Roll the cake gently but firmly, and don’t worry if it takes a few tries to get it just right. The more you do it, the easier it becomes!
Experiment with Flavors
Feel free to get creative with flavors! While the classic Oreo frosting is delicious, you can try different flavor combinations. Consider adding a hint of almond extract or using flavored whipped cream. This can elevate your cake roll to a whole new level!
Store Properly
If you have leftovers, store them in an airtight container in the refrigerator. This will keep the cake fresh for up to three days. You can also freeze individual slices for a quick treat later on. Just wrap them tightly in plastic wrap and place them in a freezer-safe container.
By following these tips, you’ll be well on your way to mastering the art of the Red Velvet Oreo Cake Roll Explosion. Each attempt will bring you closer to perfection, and soon, you’ll be impressing friends and family with your baking skills!
Breakdown of Time for Red Velvet Oreo Cake Roll Explosion
Understanding the time needed for each step of the Red Velvet Oreo Cake Roll Explosion is essential for planning your baking session. Here’s a detailed breakdown of the time you’ll need to create this delicious dessert.
Prep Time
Getting everything ready is the first step. For the Red Velvet Oreo Cake Roll Explosion, you’ll need about 30 minutes for prep. This includes gathering your ingredients, measuring them out, and mixing the cake batter. Don’t forget to preheat your oven during this time!
Cooking Time
Once your cake batter is ready, it’s time to bake! The cooking time for the cake is approximately 15-20 minutes. Keep an eye on it, and check for doneness with a toothpick. If it comes out clean, your cake is ready to cool!
Total Time
In total, you can expect to spend around 1 hour to 1 hour and 15 minutes on the entire process. This includes prep and cooking time. However, remember that you’ll also need to allow the cake to cool completely before frosting it, which can take an additional 30 minutes to an hour. So, plan accordingly if you’re making this for a special occasion!
With this time breakdown, you can easily fit the Red Velvet Oreo Cake Roll Explosion into your schedule. Happy baking!
Nutritional Information for Red Velvet Oreo Cake Roll Explosion
Understanding the nutritional content of your Red Velvet Oreo Cake Roll Explosion can help you enjoy this delightful dessert while keeping track of your dietary needs. Here’s a breakdown of the key nutritional components per serving, which is typically one slice of the cake roll:
Calories
Each slice of the Red Velvet Oreo Cake Roll Explosion contains approximately 350-400 calories. This calorie count can vary based on the specific ingredients used and the size of the slice. While it’s a rich dessert, it’s perfect for special occasions or as an occasional treat!
Protein
In terms of protein, each slice offers about 4-5 grams. The protein mainly comes from the eggs and butter used in the cake and frosting. While this isn’t a high-protein dessert, it does provide a small boost to your daily intake.
Sodium
Each slice contains around 200-250 milligrams of sodium. This amount is relatively moderate, but if you’re watching your sodium intake, it’s good to be mindful of portion sizes. The sodium primarily comes from the baking powder and the butter used in the recipe.
By keeping these nutritional facts in mind, you can enjoy your Red Velvet Oreo Cake Roll Explosion while being aware of its impact on your diet. Remember, moderation is key, and this dessert is best enjoyed as a special treat!
FAQs about Red Velvet Oreo Cake Roll Explosion
Can I make the Red Velvet Oreo Cake Roll in advance?
Absolutely! You can prepare the Red Velvet Oreo Cake Roll in advance. In fact, making it a day ahead can enhance the flavors. Just bake the cake, roll it up, and let it cool completely. Once cooled, wrap it tightly in plastic wrap and store it in the refrigerator. When you’re ready to serve, simply frost and decorate it. This way, you’ll save time on the day of your event!
What can I substitute for Oreos in the frosting?
If you’re looking for alternatives to Oreos in the frosting, there are several options. You can use any chocolate sandwich cookie, like Hydrox or generic brands. For a different flavor, consider using crushed graham crackers or chocolate wafers. If you want a fruity twist, try adding crushed strawberries or raspberries to the frosting for a refreshing change!
How do I store leftovers of the Red Velvet Oreo Cake Roll Explosion?
To store leftovers of your Red Velvet Oreo Cake Roll Explosion, place the remaining slices in an airtight container. This will keep the cake fresh for up to three days in the refrigerator. If you want to keep it longer, you can freeze individual slices. Just wrap them tightly in plastic wrap and place them in a freezer-safe container. When you’re ready to enjoy, simply thaw in the refrigerator overnight!
Can I freeze the Red Velvet Oreo Cake Roll Explosion?
Yes, you can freeze the Red Velvet Oreo Cake Roll Explosion! To do this, make sure the cake is completely cooled and frosted. Wrap it tightly in plastic wrap, then place it in a freezer-safe container. It can be frozen for up to three months. When you’re ready to enjoy it, thaw it in the refrigerator for several hours or overnight. This way, you can savor this delicious dessert whenever you like!
Conclusion: Enjoying Your Red Velvet Oreo Cake Roll Explosion
In conclusion, the Red Velvet Oreo Cake Roll Explosion is not just a dessert; it’s an experience! With its vibrant colors, rich flavors, and delightful textures, this cake roll is sure to be a hit at any gathering. Whether you’re celebrating a special occasion or simply indulging in a sweet treat, this dessert will leave a lasting impression on your taste buds.
As you slice into the cake, you’ll reveal the beautiful swirl of red velvet and creamy Oreo frosting. Each bite offers a perfect balance of sweetness and richness, making it hard to resist going back for seconds. Plus, the fun toppings of whipped cream, crushed Oreos, and chocolate syrup add an extra layer of excitement to every serving.
Remember, baking is all about creativity and joy. Don’t hesitate to experiment with different fillings and toppings to make this cake roll your own. Whether you stick to the classic recipe or try out new variations, the Red Velvet Oreo Cake Roll Explosion is bound to be a crowd-pleaser.
So, gather your ingredients, invite some friends over, and get ready to create a dessert that will be the talk of the town. Enjoy the process, savor the flavors, and most importantly, have fun! Happy baking!
Relevant Recipes Link:
Craving more delightful dessert recipes like this Chocolate Cake Roll? Explore these tempting options:
- Lemon Blueberry Cheesecake Bars: A Refreshing Dessert
- Raspberry Almond Crumble Bars: A Sweet Indulgence
For more delicious recipes and culinary inspiration, follow us on Pinterest!